To get full VPN access, your computer must be up-to-date with its anti-virus software and have a firewall in place. To troubleshoot firewall issues, contact ITAC.
There are two steps needed to use the VPN:
After completing these two steps, you will be able to use a variety of campus resources otherwise restricted to using while on campus.
Step 1: Install the F5 Endpoint Inspection Scanning Software
- Go to https://remoteaccess.txstate.edu.
- Enter your NetID and password, and click Login.

- Complete NetID 2-Step authentication.
You will need to install Endpoint Inspection which will scan your computer for vulnerabilities before allowing you to access the VPN.
- On the "Browser needs permission to start endpoint checks" menu, click Start

- Under "Waiting for Endpoint Inspection status" click Install.

- In the "Endpoint inspection client components required" menu , click Download.

- Open the downloaded file and click Continue if prompted to grant permission.


- Once the install window completes, click Click Here on the "Endpoint inspection client components required" menu in your browser.

- When prompted, allow the browser to open the F5 Endpoint Inspector by clicking Open Link.
- Note: If you intend to use the VPN often, check "Always allow..." to skip this step on future connections.

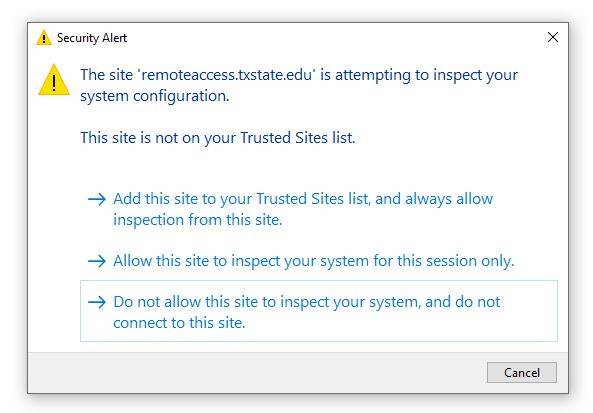
- Add the Remote Access website to your list of trusted sites by clicking Add this site to your Trusted Sites list.
You will see an indicator as the software scans your system.

- You are now ready to connect to the VPN

Step 2: Connect to the VPN
- Go to https://remoteaccess.txstate.edu.
- Enter your NetID and password, and click Login.

- Complete NetID 2-Step authentication.
- When the Browser Needs Permission to Star Endpoint Checks menu appears, click Start
.
- When prompted, allow the browser to open the F5 Endpoint Inspector by clicking Open.
- Note: If you intend to use the VPN often, check "Always allow..." to skip this step on future connections.

- Under Network Access, click TXST VPN.

- When prompted with the "Browser needs permission to start VPN" menu, click Start.

- When prompted for permission to open F5 VPN, click Open.
- Note: If you intend to use the VPN often, check "Always allow..." to skip this step on future connections.

A window will open showing the software connecting to the VPN. Once the software is connected, it will drop down into the system tray.

You are now connected to VPN.
Now that your device is connected, you can access several apps such as these:
- Class Database - your class may use VPN to connect to a database on campus
- Remote Desktop Connection - allows you to remote to your work computer
- SAP Business Client - allows you to access this software from off-campus
- Department Share Drive or UDrive - allows you to access your files from off-campus